Receiving ADS-B Signals Using RTL1090 and Virtual Radar Server on Windows 10
ADS-B stands for Automatic Dependent Surveillance–Broadcast and is transmitted by planes equipped with ADS-B-Out. The signal is broadcast on 1090MHz and includes the aircraft's GPS and avionics systems:
- Plane's position
- Altitude
- Heading
- Speed
- Flight ID
I used the RTL-SDR Blog V4 receiver, RTL1090 decoder and Virtual Radar Server. See RTL-SDR Tutorial for more details.
Install RTL1090
I downloaded the RTL1090 - IMU (Installer and Maintenance Utility) from https://rtl1090.com/. This gathered the files needed as well as zadig for installing the RTL-SDR drivers.
For some reason RTL1090 didn't pick up my RTL-SDR and I needed to install the drivers again with zadig.
The RTL1090 software requires some additional files.
- libusb-1.0.dll
- rtlsdr.dll
Whilst the website says the can be downloaded from [http://web.archive.org/web/20130121051904/http://sdr.osmocom.org/trac/attachment/wiki/rtl-sdr/RelWithDebInfo.zip] these were out of date now. The versions that worked could be downloaded from the RTL-SDR Blog Driver GitHub releases page. The files above are available in the x86 directory - just copy them into the directory with RTL1090.
Once installed, run the application and allow the firewall access pop up (this will be needed for Virtual Radar Server to connect). Click the START button and it should connect to the RTL-SDR and tune to 1090. The port the application has opened up is shown at the bottom of the window (and will be needed in Virtual Radar Server).
Once running and some planes are close it will start to list them as below.
Initially I just connected my 120 degree V-Dipole to the RTL-SDR and it picked up some planes fine. Later I will make a spider antenna and compare how well that performs.
Install Virtual Radar Server
Download the Windows installer from [https://www.virtualradarserver.co.uk/Download.aspx] and install.
Once installed, launch from the Start Menu and then click Tools -> Options... to add in the connection to RTL1090. Click on Receiver and then use the Wizard to configure a connection to the RTL device. If it doesn't find the device check the port listed by RTL1090 as mentioned above.
After this launch http://127.0.0.1/VirtualRadar to see the mapping.
I used FlightRadar24 to see planes that were coming close, to test if I was receiving them.
This is what the server looked like once it started to detect signals.
And here is a plot of some of the planes on the Virtual Radar mapping
Viewing in SDR
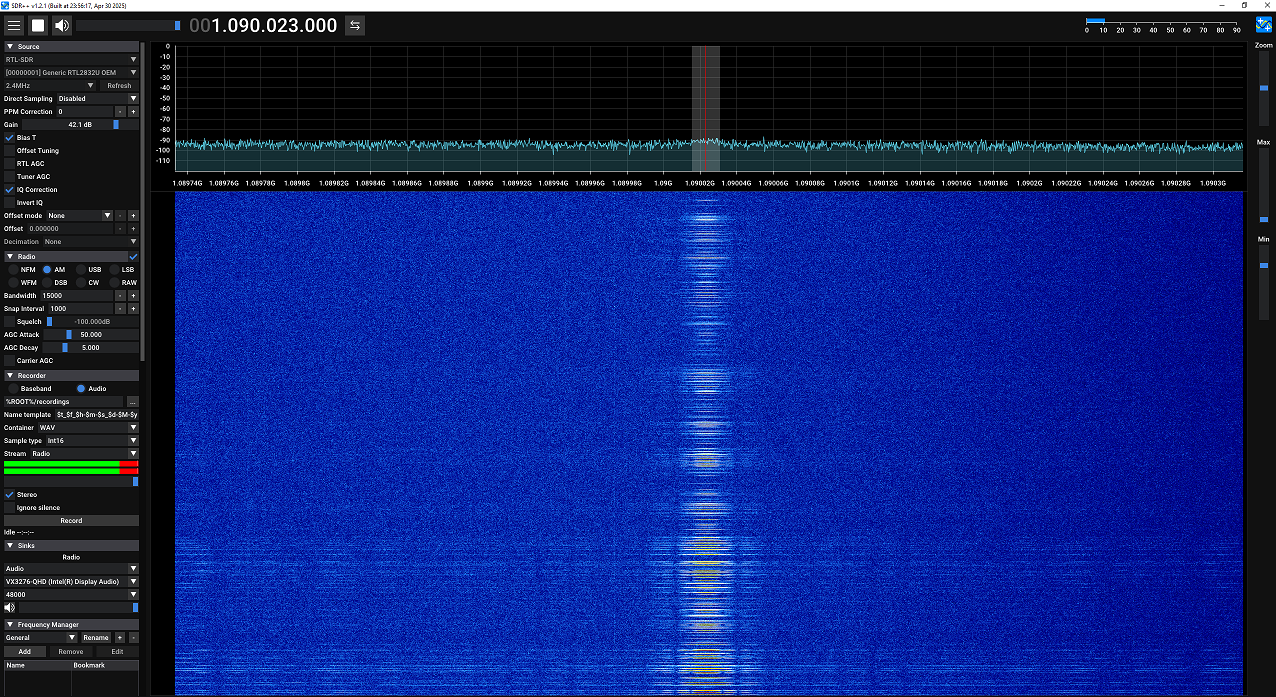
Here's what the signal looks like on a waterfall spectrum.

Create a Spider Antenna
I followed the guidance https://discussions.flightaware.com/t/three-easy-diy-antennas-for-beginners/16348/2 to create an antenna specifically tuned for 1090MHz.
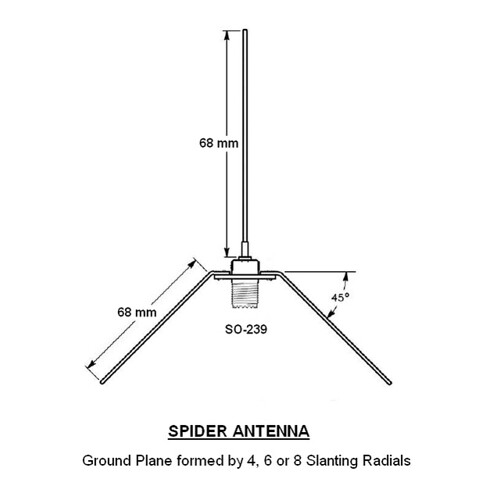
I used this schematic, and built an 8-legged antenna.

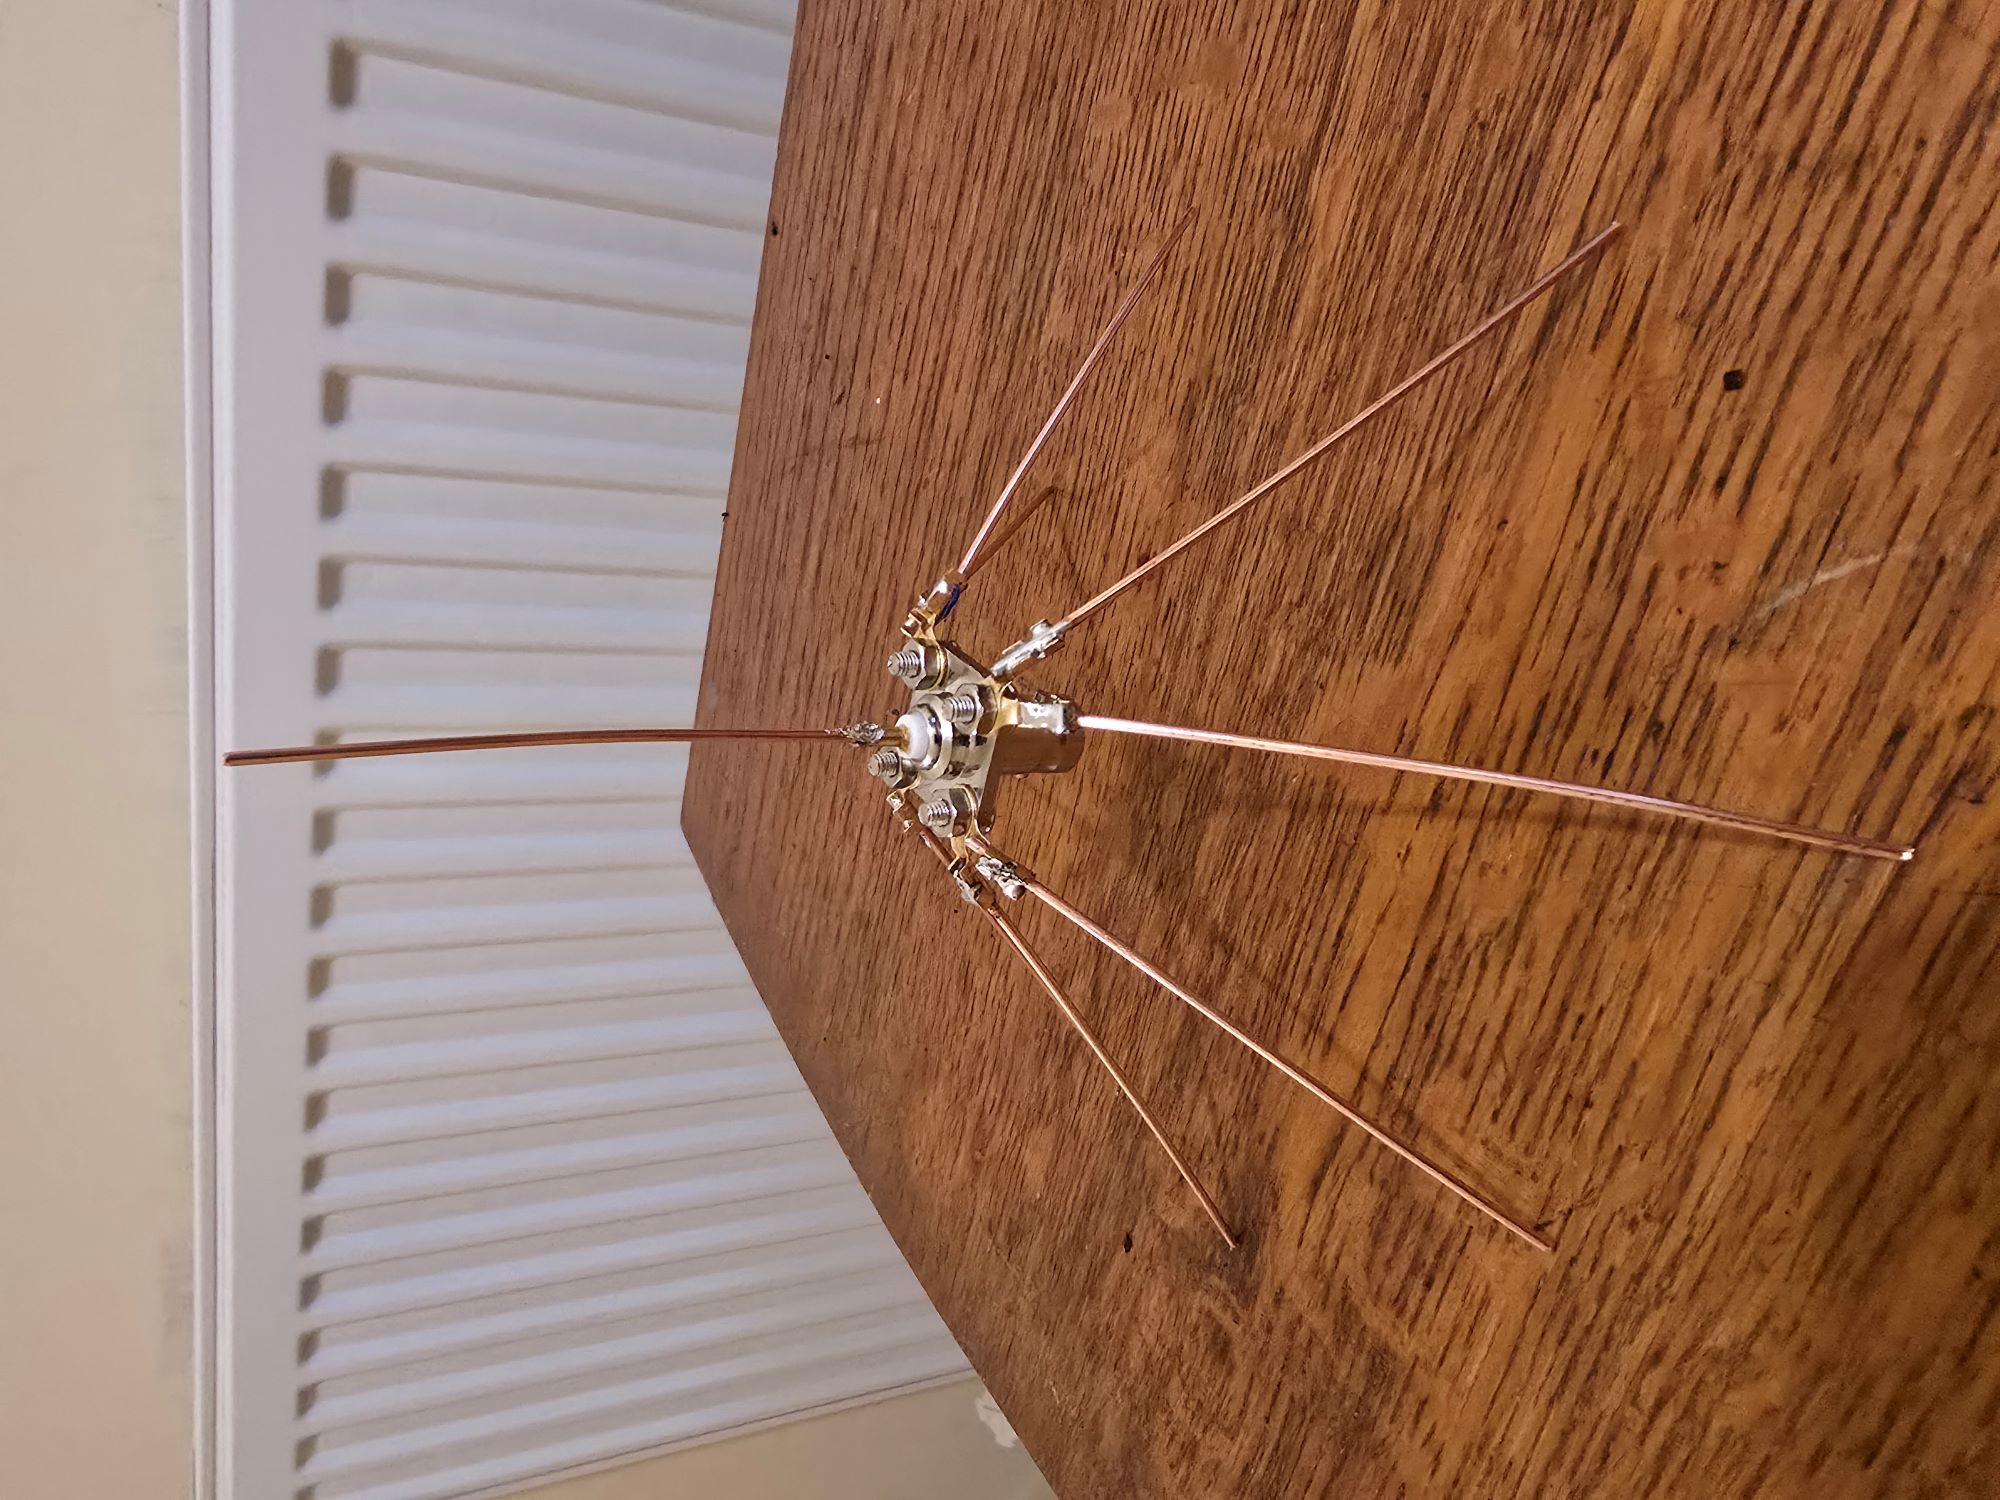
Here's the finished antenna - much smaller than I expected!

The parts I ordered from Amazon for making this were:
- M2 M2.5 M3 Screws Set, 874 Pcs Flat Hex Socket Head Cap Bolts and Nuts Set, Flat Machine Screws, Countersunk Bolts Set, Allen Head Nuts and Bolts Assortment Kit
- QOOSIKICC 160 Pcs Copper Ring Terminals, M3/M4/M5/M6/M8/M10 Brass Wire Connectors, Open Barrel Wire Cable Lugs Crimp Kit, Brass Copper Ring Crimp Cable Electrical Terminals Kit
- TUOLNK 2 Pack BNC Female 4 Holes Flange Panel Chassis Mount Coaxial Solder Connector RF Coax Adapter Convertor for Coaxial Cable/Wireless Lan Devices
For the copper elements I used the earth from some 2.5mm twin and earth cable which although easily bent, is firm enough. It also fit into the copper soldering cup nicely. I soldered all of the connections to the copper wire for better conductivity but then used M3 bolts to attach the legs to the connector.
Follow on
- Try feeding data into an online service
- Explore the SISEX (Signals In Space Explorer)
- Explore the HTTP functionality mentioned in v3 at the end of this blog